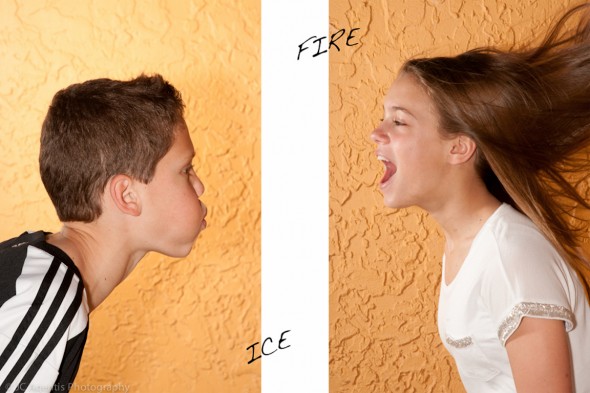
Last year I was given a very cool photo opportunity involving composite work. With this op I was fortunate to be able to build it from the ground up starting with the shoot. Believe me, I’ve gotten some rather creative requests ‘after the shoot’; sometime even months after.
The Project, to represent a brother and sister as Fire and Ice for their upcoming Mitzvah. 6′ banners would be made of each and hang from the ceiling at the event. Very cool, right…
In the prelim photo shoot I positioned them as if they were breathing fire and ice. Being on location I needed to find a background free of distractions. Chosen, was a warm wall with no shadows, etc. In post, the warmth would work fantastically for the Fire piece, but would definitely propose a challenge for Ice. To give the Ice shot a ‘cold’ tone, an additional step was needed.
Fire:
Step1: I found a fiery red textured background, added as a layer, changed blend mode to Overlay, created a mask then painted in the red overlay around the subject. This isolated the subject in the fiery background.
Step 2: I warmed up the subject a bit more
Step 3: I copied some sun glasses from an old photo, redesigned them with a brush so as to match the motif of fire, etc.
Step 4: I made a gradient layer with a black/blue tone to create a night sky (like outer space) for the top left side of the frame.
Step 5: I took a Fire brush and painted in the fire, changing the color as I went along for different flame shades. I actually used several different brushes to make them more real. Here is where some of my art training came handy:)
Step 6: I then took a brush and painted in some stars of varying sizes to finish it up.
ICE
Step 1: I added a black/blue layer in Normal blend mode, created a mask and painted in all around the subject…isolating the subject what would be a night sky/outer space.
Step 2: I added an icey blue layer to change the subject’s skin tone to match the Ice motif.
Step 3: I used glasses from an old photo and with a brush, redesigned them to match the concept.
Step 4: I used Ice Cube brushes to paint in the ice, changing the shades of color and size as I went along.
Step 5: I then painted in some icecycles to make the image seem really cold.
Step 6: I used various brushes and shades of white to gray, to paint in the icey breath.
Step 7: I then painted in some stars to finish it off.


This was definitely a learning experience that I’m glad I had. I pushed myself and came out more knowledgeable…